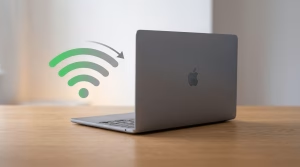
কখনো কখনোও ঘরের চাঁদ রেখে আকাশের চাঁদ দেখা লাগে 😍
তাক্বাব্বালাল্লাহু মিন্না ওয়া মিনকুম
ঈদ মোবারক 🌙
Live Server with NodeJS
The NodeJS live-server package runs a temporary server displaying any HTML/CSS/JS resources in the current folder. It automatically reloads the page in your browser when any of these files change.
- Verify that Node.js is installed. If you see anything when you run
which npm
in a terminal, it is. If not, follow the instructions at nodejs.org to install. - Install live-server:
npm install -g live-server
- Move your terminal to where your pages live:
cd <path-to-content>
- Start the server:
live-server .
- Open localhost:8080 in a browser.
MacOS Dock Auto Hiding Delay
How to speed up MacOS Dock Auto Hiding Animations
Use Terminal to speed up your Dock animations
You can accelerate the speed of animations used in your Dock by running a simple command in Terminal; here’s how:
- Open Terminal from Finder > Applications > Utilities.
- Insert the below commands, depending on what you want to achieve. Once you insert a command, press Return to run it:
- To speed up Dock animations
defaults write com.apple.dock autohide-time-modifier -float 0.15;killall Dock
- To disable Dock animations
defaults write com.apple.dock autohide-time-modifier -int 0;killall Dock
- You can always reinstate your original Dock settings with the below command:
defaults delete com.apple.dock autohide-time-modifier;killall Dock
Auto hide delay tweaking Enter this into Terminal to make the Dock show without a delay : `defaults write com.apple.dock autohide-delay -float 0; killall Dock;` Maybe you want to have a long delay (5 seconds) so that you never accidentally trigger the Dock: defaults write com.apple.dock autohide-delay -float 5; killall Dock; To restore defaults: defaults delete com.apple.dock autohide-delay; killall Dock; Animation speed tweaking Enter this into Terminal to make the Dock show without animations : defaults write com.apple.dock autohide-time-modifier -float 0; killall Dock; It's still nice to have a short animation (0.2 seconds) and this line makes it possible: defaults write com.apple.dock autohide-time-modifier -float 0.2; killall Dock; To restore defaults: defaults delete com.apple.dock autohide-time-modifier; killall Dock;
রাজশাহীর কালাভুনা
ভোজন রসিকদের পছন্দের শীর্ষে এখন রাজশাহীর কালাভুনা
রাজশাহীর কালাভুনা এ অঞ্চলের একটি বিশেষ আকর্ষণীয় খাবার। এটি প্রধানত গরুর মাংস দিয়ে তৈরি করা হয়। কালাভুনা তৈরির প্রক্রিয়ায় মাংসকে বিভিন্ন মসলা দিয়ে মেরিনেট করে নিয়ে খুব ধীরে ধীরে রান্না করা হয়, যাতে মাংস সম্পূর্ণরূপে মসলা শুষে নিতে পারে এবং একটি গভীর, সমৃদ্ধ স্বাদ অর্জন করে।
এই প্রক্রিয়ার ফলে কালাভুনা তার বিশেষ গাঢ় রঙ এবং স্বাদের জন্য পরিচিত হয়। এটি সাধারণত পোলাও, ভাত বা রুটি সহ পরিবেশন করা হয় এবং বাঙালি রাঁধুনিদের মধ্যে একটি প্রিয় খাবার হিসাবে জনপ্রিয়। কালাভুনার অনন্য স্বাদ এবং ঘ্রাণ রাজশাহী অঞ্চলের খাদ্য সংস্কৃতির একটি গুরুত্বপূর্ণ অংশ। এটি শুধুমাত্র স্থানীয় নয়, যারা একবার এই খাবারটির স্বাদ গ্রহণ করে, তাদের স্মৃতিতে চিরকাল থেকে যায়।
রাজশাহীর কালাভুনা সাধারণত দুপুরে পরিবেশন করা হয়।
সিটিহাট
হানিফ কালাভুনা খোলা – শনিবার, রবিবার, মঙ্গলবার, বুধবার (01726258103)
রিপন কালাভুনা খোলা – রবিবার ও বুধবার (01763107011)
নওহাটা
হানিফ কালাভুনা খোলা – সোমবার, বৃহস্পতিবার (01726258103)
রিপন কালাভুনা খোলা – পুরো সপ্তাহ (01763107011)
Last updated at
Unpack wpress file using Node.Js
We’ll be using Node.js in this way. Node.js has the benefit of being able to open WordPress files on Windows, MacOS, and Linux. However, Method 1, which only works with Mac and Windows, requires the usage of wpress-extractor.
We need NodeJS for this method. Now let us move on to the steps required to extract wpress file.
Step 1: Download NodeJS installer from the official website.
Step 2: Run the installer and install as any normal software. Restart computer.
Step 3: Open command prompt and test whether Node JS has been installed successfully and working.
For this type Node -v in command prompt. It will print version of NodeJS file.
Step 4: Now open the folder where you exported your wpress file then in command prompt type this:
npx wpress-extract your_backup_file.wpress
It will create a new folder named your_backup_file where all the content will be extracted.
Journey of Life
the man who blames other, has long way in journey to go,
the man who blames himself, half way there,
the man who blames no one, has arrived.
Disable/Enable Spotlight in Mac OS with Terminal
Disabling Spotlight in MacOS is pretty easy, launch the Terminal and type the following command:
sudo mdutil -a -i off
This tells the Spotlight manager to disable all indexing on all volumes, the command will require your administrative password to execute.
Re-enabling Spotlight in MacOS is just as easy, just reverse the command to:
sudo mdutil -a -i on
Now Spotlight indexing will be back on and work as usual.
How to encode and decode HTML entities with JavaScript
In JavaScript, decoding and encoding HTML entities is a common task when dealing with user-generated content or manipulating strings. These functions can be used to encode and decode HTML entities as there is no built-in method in JavaScript. It’s essential for securing and properly displaying user input in web applications.
Decode HTML-entities
function decodeHTMLEntities(text) {
var textArea = document.createElement('textarea');
textArea.innerHTML = text;
return textArea.value;
}
Decode HTML-entities (JQuery)
function decodeHTMLEntities(text) {
return $("<textarea/>")
.html(text)
.text();
}
Encode HTML-entities
function encodeHTMLEntities(text) {
var textArea = document.createElement('textarea');
textArea.innerText = text;
return textArea.innerHTML;
}
Encode HTML-entities (JQuery)
function encodeHTMLEntities(text) {
return $("<textarea/>")
.text(text)
.html();
}
পাল পাল
পাল পাল তারপে জিস পাল কে লিয়ে,
ও পালভি আয়া কুছ পাল কে লিয়ে,
শোচা উস পালকো রোকলু হার পাল কে লিয়ে,
পার ও পালভি ঠেহারা কুচ পাল কে লিয়ে,
Increase Your Apple Magic Mouse Speed

Increasing the magic mouse speed is incredibly simple using just a few Terminal commands. Here is exactly what you need to do:
- Open Terminal (Applications > Utilities > Terminal)
- Type this command to see your current mouse speed setting:
defaults read .GlobalPreferences com.apple.mouse.scaling
or
defaults read -g com.apple.mouse.scaling
- To increase the speed, enter a new scaling value like so. The default is 3 – try something between 4-12:
defaults write .GlobalPreferences com.apple.mouse.scaling 8
or
defaults write -g com.apple.mouse.scaling 5
- When ready, quit Terminal and reboot your Mac for the new setting to take effect.
That’s all there is to it! Once your system restart, you’ll instantly notice how much faster and more responsive your mouse movement is.
The reason this works is it overrides the default scaling value set by Apple. They configure the Magic Mouse Speed out of the box to be slower than the maximum speed allowed in System Preferences. But with this quick terminal command, you can boost it well beyond the standard limit.